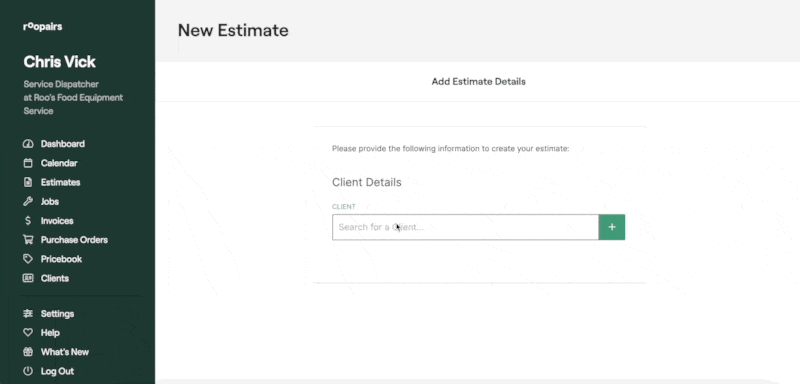
Creating and sending an Estimate
Roopairs allows you to create new Estimates for current or new clients. Once you have entered in the details of your Estimate (service type and estimated service charges/parts) you are then able to use Roopairs to electronically send the Estimate to your clients via email or text. Follow these steps to create your first Estimate.
Create a New Estimate
From the Dashboard select + New Estimate.
- Or, using the sidebar on the left, select
Estimatesand then in the top right click+ New Estimate.
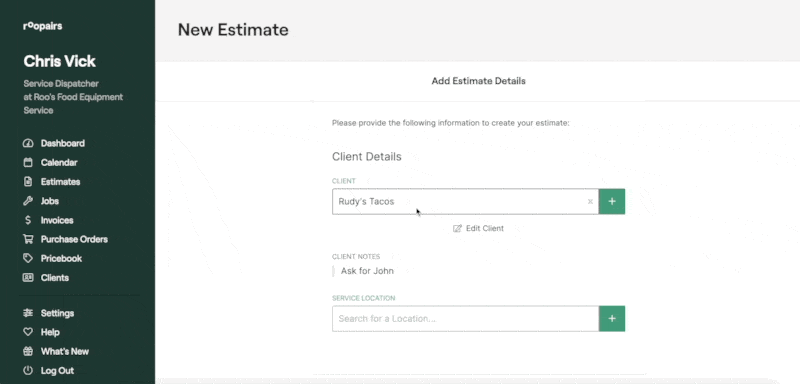
Select your Client
You can select the client this Estimate is for from the dropdown by either clicking into the dropdown and choosing from the list or by typing in the name of the client the Estimate is for.
- If this Estimate is for a new Client that is not already in your system you can click the green
+button to create your new client with the appropriate client details. Learn how to create a new client HERE.
Select your Service location
You can select the Service Location this estimate is for from the dropdown by either clicking into the dropdown and choosing from the list or by typing in the name/address of the Service Location the estimate is for.
- If this Estimate is for a new Service Location that is not already in your system you can click the green
+button to create a new Service Location with the appropriate details. Learn how to create a new Service Location HERE.
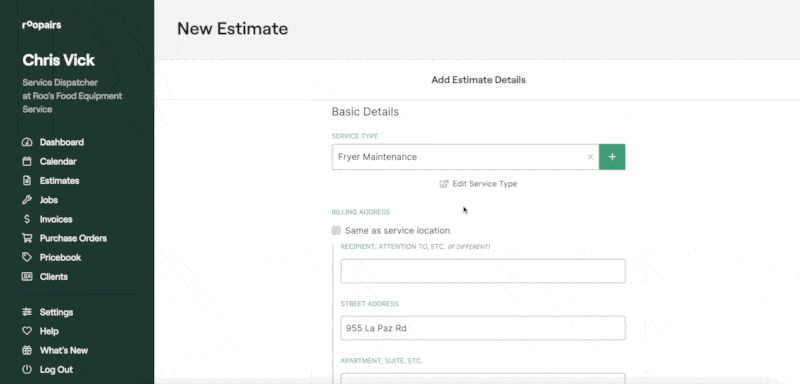
Select your Service Type
You can select the Service Type for this Estimate from the dropdown by either clicking into the dropdown and choosing from the list or by typing in the name of the Service Type for this Estimate.
- If this Estimate will be for a new Service Type that is not already in your system you can click the green
+button to create a new Service Type with the appropriate details. Learn how to create a new Service Type HERE.
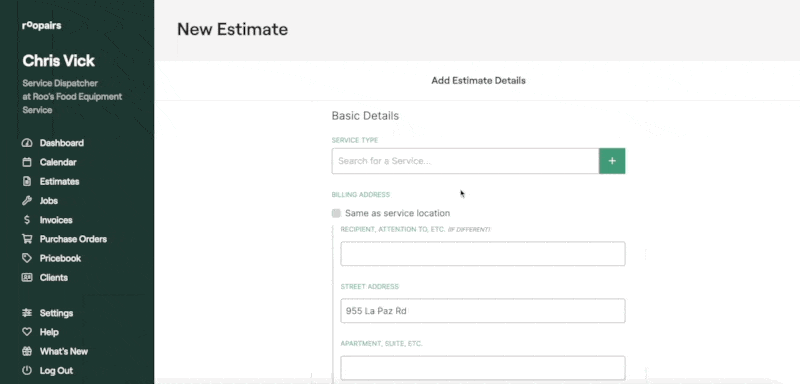
Enter in the Billing Address
Once you have selected your Service Type you will want to enter in the billing address details.
- Or, if the Billing Address is the same as the Service Location you can click the box that says
Same as Service Location.
Select your Issue Date and Expiration Date
Once you enter in the Issue Date and Expiration Date you will be able to select your Estimated Service Charges, Parts and Materials, Trip Charges, and Discounts if any of these apply to this Estimate.
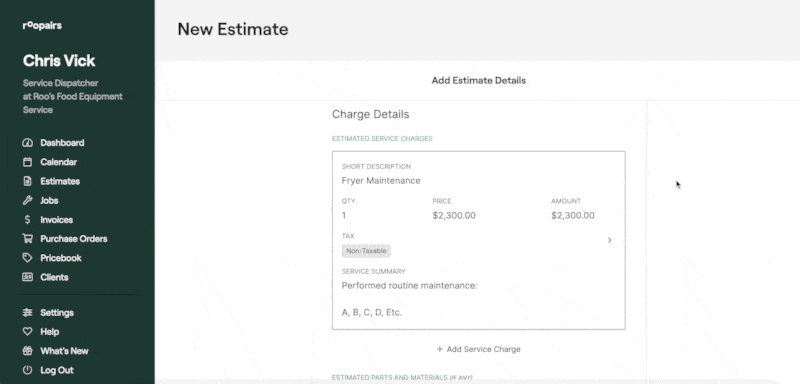
Add Service Charge
The first thing you will want to do is add your estimated Service Charges by clicking the + Add Service Charge button.
- Select which type of service you are providing.
- Select whether this is an Hourly Service Charge or a Flat Rate.
- Select whether this is a
TaxableorNon Taxableservice. - At the very bottom of the page you can choose to enter in a Service Summary if you wish too.
- Review the items of your Service Charge and click the green
Addbutton at the bottom when finished. - If there are additional Service Charges for this Estimate you can now repeat this process to add the additional charges.

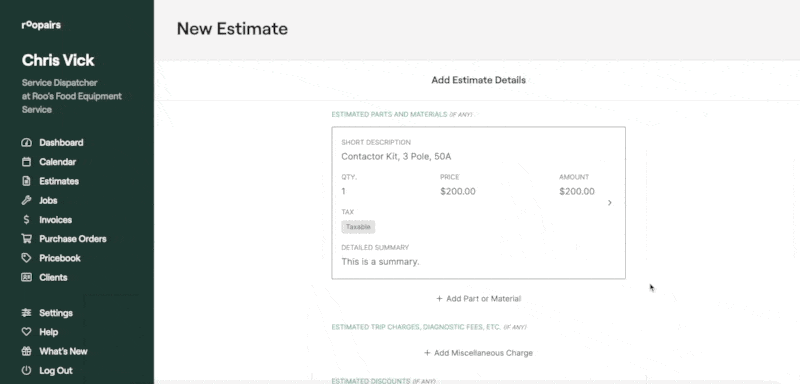
Add Estimated Parts and Materials
If this Estimate will require any parts you can add them to the Estimate by clicking the + Add Part or Material.
- Select the necessary part from the dropdown or you can search it by name in the dropdown as well.
- Enter in the Quantity and Unit Price of the part.
- Select whether this is a
TaxableorNon Taxableitem. - Enter in any additional notes regarding this part in the Detailed Summary section at the bottom.
- Once you have verified these details you can click the green
Addbutton at the bottom to add this part to your Estimate. - If there are additional parts required for this Estimate you can now repeat this process to add those items as well.
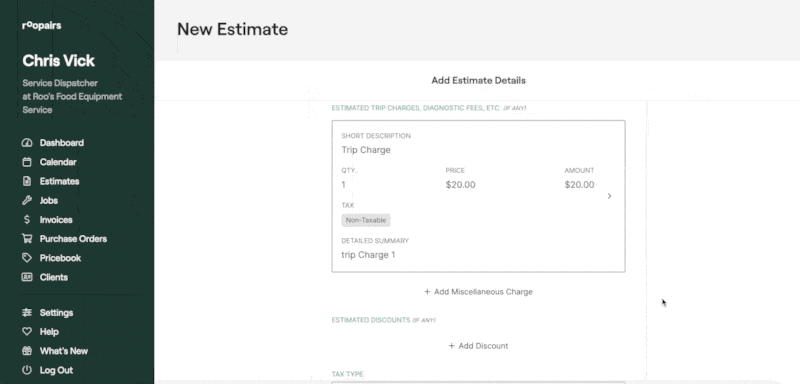
Add Miscellaneous Charges
If this Estimate will require any Miscellaneous Charges you can add them to the Estimate by click the + Add Miscellaneous Charge button.
- Select your Miscellaneous Charge from the dropdown or search it by name in the dropdown.
- Enter in the Quantity and Unit Charge for this Miscellaneous Charge.
- Select whether this is a
TaxableorNon Taxableitem. - Enter in any additional notes regarding this Miscellaneous Charge in the Detailed Summary section at the bottom.
- Once you have verified these details you can click the green
Addbutton at the bottom to add this part to your Estimate. - If there are additional Miscellaneous Charges required for this Estimate you can now repeat this process to add those items as well.
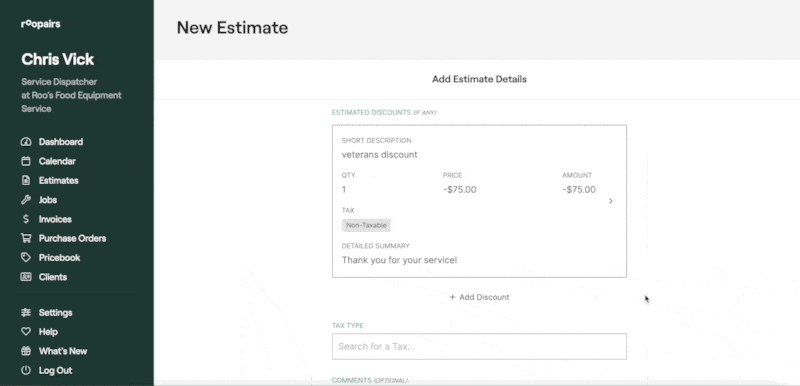
Add Discounts
If this Estimate will require any Discounts you can add them to the Estimate by clicking the + Add Discount button.
- Select your Discount from the dropdown or search it by name in the dropdown.
- Enter in the Quantity and Unit Price of this Discount.
- Enter in any Additional Notes regarding this Discount in the Detailed Summary section at the bottom.
- Once you have verified these details you can click the green
Addbutton at the bottom to add this discount to your Estimate. - If there are additional discounts required for this Estimate you can now repeat this process to add those items as well.
Select your Tax Type for this Estimate via the dropdown or search it by name in the dropdown.
If you require a Down Payment for this Estimate you can enter it in at the bottom of the page in the Required Down Payment section.
Review and Send Estimate
Review the Estimate to verify you have all the correct details entered in.
- You can choose to preview the Estimate to see how it will be displayed to your clients by clicking the
Preview Estimatebutton at the bottom. - If you still need additional details for this Estimate before sending it out, you can also save the Estimate as a draft and return to it later by clicking
Save Draftat the bottom. - If you have reviewed the Estimate and verified it is ready to send, you can click the green
Create and Sendbutton at the bottom of the page.